The misconception that gravy is fussy, difficult to prepare, and difficult to reheat is untrue. Gravy can be prepared a day in advance and reheated. Thanksgiving day gravy can be prepared weeks in advance, frozen, and heated. There is no need to stress over gravy as long as you follow a few fundamental rules.
How to Reheat Gravy?
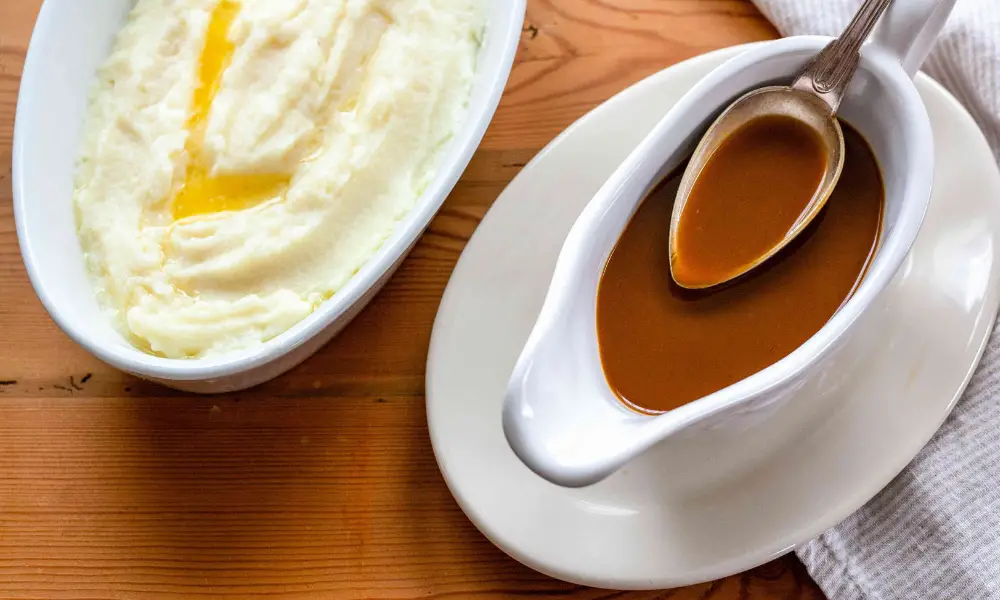
The Skillet is the Best for Reheating Gravy
Gravy should always be heated slowly and gently. Low here refers to both heat and pan size. Instead of using a pan, choose a skillet to maximize the surface area of the gravy and reheat it gently and evenly. Here are the three procedures for reheating gravy.
Spoon it into the skillet to break up the gelled gravy into chunks that are simple to reheat.
Low heat: Don’t heat the pan before adding the gravy. Start the chilled gravy’s gentle reheating in a cool pan.
As you reheat the gravy, stir until it simmers to ensure even heating.
Reheating Gravy on the Stovetop
To get a smooth consistency, reheat the gravy over low heat while swirling it with a spoon or fork. If the gravy has split, add extra liquid and stir until it comes back together. If the gravy has gelled, pour it into a cool pan while breaking up any large bits.
On the Stove, Reheat Gravy As Follows:
- Put the gravy in a cool pan by ladling.
- To assist the gravy heat more quickly, split it up into smaller bits if it has thickened into a jelly-like consistency.
- Reheat on low heat while frequently stirring to break up any lumps.
- If the gravy has separated, whisk it ferociously together once more.
- Add more stock or milk if the gravy needs to be thinned out because it is too thick.
- Add a cornstarch slurry to the gravy if it appears too thin (you must bring it to a boil before the cornstarch takes effect).
- Increase the heat to medium to hasten the process if you have a lot of gravy to reheat.
- Don’t forget to stir, though, as the gravy tends to stick to the pan’s bottom.
Using the Microwave to Reheat Gravy
Put the gravy in a bowl that can be heated in the microwave and cover it with a lid or plastic wrap (with some holes for steam to escape). Stir the gravy after 30 seconds of heating. Stirring each time, continue the process in 30-second intervals until the gravy is hot. Don’t let it get too hot.
In a Microwave, Reheat Gravy As Follows:
- After scooping it into a microwave-safe dish, place a splatter lid on the gravy. Plastic wrap works as a lid if you don’t have one.
- Stir after 30 seconds of heating.
- Stirring between each repetition, repeat 30 seconds at a time.
- Add some stock to thin up the gravy if it appears too thick.
- The gravy should be stirred to ensure even cooking. You risk getting cold spots if you fail to stir.
- To avoid overheating the gravy, apply heat for brief intervals.
Reheating Gravy in the Oven
Put the gravy in a dish that can go in the oven. Set the oven’s temperature to 350°F (177°C). While heating for 5 to 10 minutes, cover the pan with foil, monitoring and stirring the gravy as needed. Spread the gravy evenly and break up any big clumps.
In the Oven, Reheat Gravy as Follows:
- Set your oven’s temperature to 350°F (180°C).
- Spread the gravy out evenly in the dish of your choice.
- Wrap foil tightly around the gravy.
- Stirring every 5 to 10 minutes, heat for that long.
- The foil will contain the steam, preventing the gravy from drying out.
- Pick your food carefully. Keep in mind that if the gravy is poured too thinly around the baking dish, it will heat up rapidly.
How to Store Gravy?
As long as it’s in an airtight container, gravy can be kept in the refrigerator for up to two days without any problems. You can remove your gravy from the refrigerator, heat it to a boil, then let it cool and store it once more to extend its shelf life. The gravy will then keep for another two days.
The re-boiling procedure can technically be repeated endlessly, but I don’t advise. Even while your gravy doesn’t need to reach room temperature before being stored, you should try to cool it down as much as possible before putting it in the refrigerator.
Spread big amounts of gravy into smaller chunks to hasten the cooling process. Alternately, place the gravy in a container and cover it with cold water.
Gravy shouldn’t be left at room temperature for longer than two hours. Don’t worry if your gravy turns to jelly in the refrigerator. As you reheat it, it will immediately get thinner.
Can Gravy be Frozen?
If your gravy contains a lot of milk or cream, it can split when it thaws. With some ferocious stirring, you might be able to reassemble it. Gravies without dairy ingredients keep well in the freezer for up to 4 months.
When thawed, cornstarch-thickened gravies may lose some of their thickness. However, adding extra cornstarch to thicken them again won’t have any unfavorable effects.
- Allow the gravy to come to room temperature before spooning it into the freezer-safe container of your choice. You can use ice cube trays, freezer bags, or airtight containers.
- Put the gravy in the freezer after sealing the container.
- When the gravy cubes have completely frozen solid on an ice cube tray, please remove them and place them in a freezer bag.
- For optimum quality, use the gravy within four months (although it will remain safe to use beyond this).
- If I know I’ll need all the gravy at once; I like to use freezer bags.
- They are simple to fill and take up little space in the freezer if you lay the bags flat.
- If you use an airtight container, throw a layer of plastic wrap over the gravy’s top to help prevent freezer burn.
How do I Store Gravy in a Refrigerator in an Airtight Container?
Gravy should be kept in your refrigerator in an airtight container to maintain freshness. The gravy should be stored in the refrigerator within two hours after preparation. Being a multipurpose sauce, it should be kept in the refrigerator because cool temperatures are excellent for preventing bacteria growth. The remaining gravy should be refrigerated in a container that is well packed after you have served it. It can still be used within three to four months even if it won’t survive as long as the rest of your food. Make sure the container is sealed first. You can use an airtight container or a freezer bag.
Before freezing gravy, ensure it is entirely solid because otherwise, the heat from the freezer will cause the sauce to expand. When the container is airtight, you should use a rubber band marked “gravy” to close it. Freeze the container after that.
You can use a heavy-bottomed skillet to reheat the gravy. You can mix the gravy with a whisk to reheat it. Doing so will allow you to regulate the temperature and stir the mixture. A pot can also be used as a double boiler. A double boiler ensures that the components stay thoroughly combined and don’t separate.
Can You Substitute Almond Milk for Milk in the Gravy?
Almond milk has a lot of advantages over cow’s milk for making gravy. It pairs well with gravy thanks to its nutty flavor and lower sugar and fat content than cow’s milk. You could even use it to make gravy instead of milk if you’d want. These pointers will help you make vegan gravy. Could you give it a go? You might even come to enjoy it! Almond milk has fewer calories but doesn’t taste as creamy or rich as conventional cow’s milk gravy.
As a result, people who appreciate tasty, rich food and those who are allergic to dairy milk can consume it. Try it out right now! Just be sure to stick to the directions and seek advice from a dietitian before making any changes! It might be simpler than you anticipate! It’s incredibly easy to use almond milk in gravy dishes.
Substitute almond milk for the usual cow’s milk in the following ratio: 3 tablespoons of almond milk to 2 cups of ordinary cow’s milk. Just be sure to keep a close eye on it to prevent burning. Before making a move, carefully review your recipe because you might need to stir more frequently than usual. You’ll be astounded by the outcomes!
How can Milk and Flour be Used to Make White Gravy?
- Melt the butter in a medium saucepan over medium heat initially.
- When the flour is added, and the butter is melting, it will turn a light brown.
- When the mixture is smooth and creamy, gradually stir in the milk after incorporating the butter and flour.
- Continue adding milk while mixing the flour mixture to eliminate any lumps. Stir constantly as the food is heating.
- It would help if you seasoned it with salt and pepper.
- After that, the gravy should boil for around 3 to 5 minutes, or until the required consistency is achieved.
- If the gravy becomes too thick, add more milk. Depending on the gravy consistency you desire, you might need to add a cup of milk.
- If the gravy is too thin, let it simmer for more time.
- After you’re finished, taste your white sauce gravy and, if required, season with more salt. Compared to most people, we prefer more sauce. It might also be a good idea to add black pepper.
- While the gravy is still warm, enjoy it straight away!
- It takes less than 10 minutes to prepare; to be more precise, it takes closer to 6 minutes. Please make your traditional white gravy the next time you’re in the mood for it to save money.
What is the Distinction Between Brown Gravy and White Gravy?
There are two kinds of gravy fans: those who see a Thanksgiving turkey or Sunday roast covered in an amber-hued elixir when they hear the word “gravy” and those who picture a lighter-colored, extremely creamy sauce atop chicken-fried steak or buttermilk biscuits. Both are recognized as gravy and are served with dishes on special occasions, but they differ in terminology, flavors, and appearance due to a few key differences. Indicate them.
In John Egerton’s book Southern Food, white gravy is described as having humble beginnings. Egerton claims that the gravy’s coarse, “sawdusty” texture gave rise to the nickname “sawmill gravy” and made it popular with sawmill workers.
During the Civil War, sawmill workers in Kentucky regularly had coffee, biscuits, and dressing for breakfast made with beef drippings, thickened with cornmeal, and finished with milk. Because it was made using leftover meat and a small bit of dairy, it was regarded as a cheap yet delectable way to start the day.
The method is the same now, except flour rather than cornmeal is more frequently used to thicken the white gravy. Cooks start with heated sausage, bacon, or chicken fat in a skillet, add flour to make a roux, and then gradually whisk in whole milk to finish the sauce, according to The Spruce Eats. Bonus points if you include the Southern tradition of crumbled morning sausage.
Conclusion
The best way to store leftover gravy is in an airtight container or freezer bag. You can use plastic bags to store liquids, and ice cube trays work well for storing gravy. However, you should remember that gravy can develop an odor if stored in the freezer. Cover it with plastic wrap or wax paper to avoid freezer burn when freezing gravy. Once frozen, you can reheat the gravy in the fridge or stove. Make sure to stir the gravy frequently, as lumps will form in the container and affect its taste.
To reheat leftover gravy, you can use a heavy-bottomed skillet. It will give you more control over the heat and keep the ingredients from burning. Another option is using a pot as a double boiler. Both methods are safe and easy to follow. The main goal is to keep the ingredients mixed and to avoid a runny gravy. Using a whisk is a good way to accomplish this.