To properly care for your food and ensure you have enough space to store everything you wish to keep in cold storage, you must first defrost your freezer. The good news is that there is a universal agreement that defrosting your freezer should only be done once a year.
Whether you’re looking to upgrade your freezer or defrost your current unit, you’ll want to know how to do it right. If you do not take the necessary precautions, your food could spoil. It can also cost you more money in electricity. Here are a few tips to help you get the job done.
How Long to Defrost your Freezer?
This is crucial because you’ll want the process to be over as quickly as possible. The ice will melt completely in about two hours if nothing is done to speed up the process. Allowing the ice to melt naturally will require at least two hours. It may require up to 24 hours if the ice is particularly thick.
You should give the freezer 24 hours to completely defrost if you turn it off and then leave the doors open.
To prevent food from going to waste, you can defrost the freezer in advance and then use the food stored inside. Alternatively, you could borrow a neighbor’s freezer space.
How to Defrost Freezer?
It’s not difficult to defrost a freezer, but you’ll need to wait for the ice to melt before you finish. You’ll need to set up your freezer and keep your food properly.
Deactivate and Empty the Freezer
First, switch off or unplug your freezer. To simplify cleanup, you might transfer your tiny, mobile freezer to your garage or outside. Next, remove everything from the freezer and put it in coolers to prevent it from thawing.
Determine Where the Water will Go
In front of your freezer, spread out towels or plastic liners on the ground. You can also cram the lowest shelves with rags or used beach towels to absorb more moisture. A drainage hose is included in some refrigerators to help with water removal. Put the end of the freezer in a low container or bucket if it has one. You can carefully position shims under your freezer’s front legs to tilt it back toward the drainage hose to help with drainage.
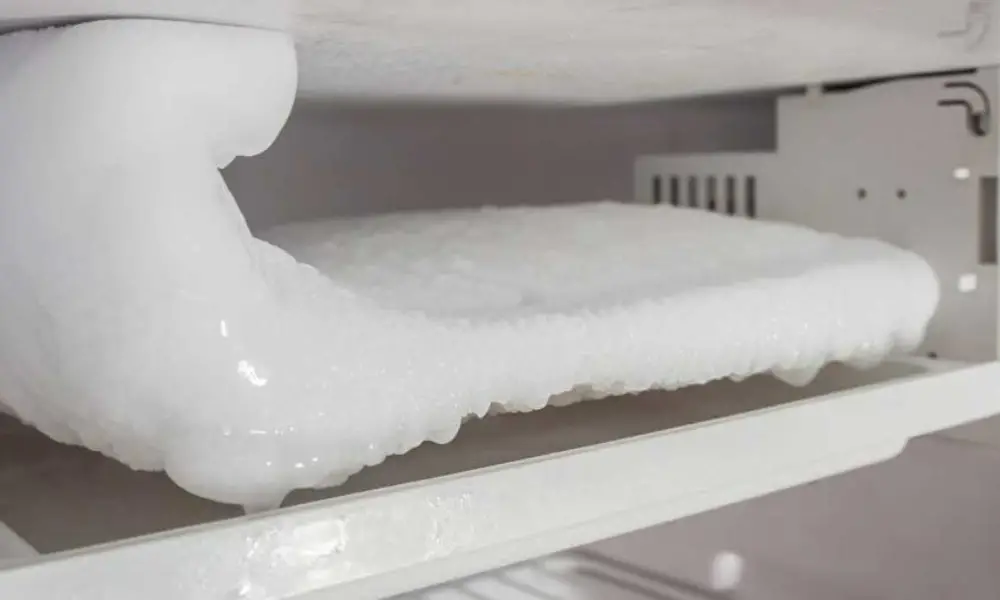
Allow the Ice to Melt
Letting the ice melt naturally is the simplest technique to defrost a freezer. After you unplug your appliance, leave the door open and wait for the ice to melt.
You can place a fan close to your freezer to aid in the defrosting process to hasten the melting process. Position the fan so that air flows into the freezer while you open the freezer door. The ice will melt a little bit more quickly because of the room-temperature air.
Wipe Down and Clean the Freezer Interior
You may begin cleaning the freezer’s interior when the ice has melted and been removed. Use rags or old towels to mop the melted ice from your freezer. Beach towels can be useful for this because of how much water they can absorb due to their enormous size.
Clean the racks, inside walls, and door of your freezer with a rag after adding one tablespoon of baking soda to four cups of hot water. After that, everything should be dried with a moist cloth.
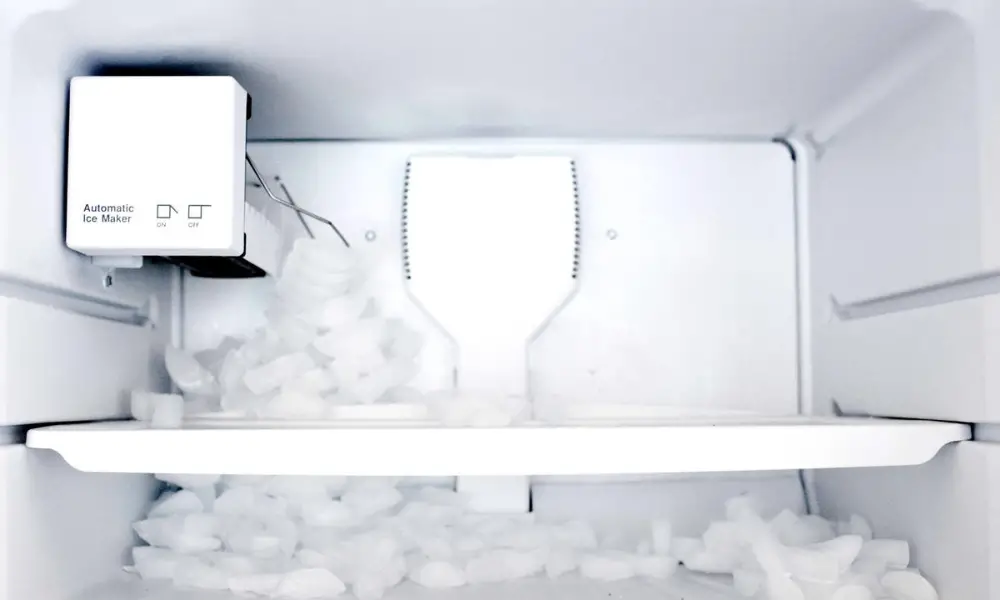
Restart it and Refuel
Turn the power back on and wait for the freezer to reach the right temperature after defrosting, cleaning, and drying it. Depending on ambient temperature and food loads, this usually takes several hours but can vary from appliance to appliance. You can remove your food from the cooler and re-insert it in your appliance once the freezer is ready.
How do you Defrost the Freezer without Switching it off?
If you have a fridge freezer, you might be reluctant to disconnect it from the wall because doing so could contaminate the food.
Remove all the freezer contents and cram them securely inside the refrigerator; carefully close the door. This will allow you to defrost the freezer without turning it off.
Then spread towels on the floor to absorb any extra water that may spill over while the freezer is being defrosted.
To hasten the procedure, use bowls of boiling water and a spatula or ice scraper, being cautious not to scratch the freezer’s walls in the process.
This should ensure that it defrosts more quickly, in 1-2 hours, instead of 3–4. Because there is a risk of electrocution when using a hairdryer, we do not advise it.
How Frequently should the Freezer be Defrosted?
Every time there is a significant accumulation of ice on the interior surfaces of a freezer, it needs to be defrosted. The defrosting procedure will retain the freezer’s effectiveness while saving you money and, most importantly, freezer space. Keep the lid shut tightly as often as possible to prevent the freezer from accumulating an excessive layer of ice.
There might be an issue with the drain or vents if you’ve noticed that your freezer produces frost quickly. To schedule a consultation with a professional, call someone for fridge repair.
How Long do Freezers Last?
A chest freezer or refrigerator freezer has a 16-year lifespan on average. The normal lifespan of a freezer is 12 to 20 years. Freezers and gas and electric stoves typically have the longest lifespan of any kitchen appliance.
But there is no assurance there! Various factors, including environmental considerations and maintenance, influence the lifespan of freezers. You can ensure that your freezer keeps cool for a very long period if you learn about good freezer maintenance.
What does the 16-year lifespan of a typical freezer mean for the one in your house? Is your freezer “average,” or will it malfunction more frequently than most?
Usually, it depends on the following things:
Quality. Models of upscale or luxury freezers often survive longer than appliances without premium components. Mini freezers might be less durable than standard home or refrigerator-freezers.
Maintenance. Only properly cared-for freezers have an average lifespan of 16 years.
Repairs. Some appliance repair companies use aftermarket components or other “shortcuts” that don’t permanently fix a freezer issue. The simplest remedy?
Usage. Keep the freezer between 0 and 5 degrees Fahrenheit, keep blockages out of the vents, and try not to overfill the appliance. A freezer will age faster if it is misused.
Environment. Keep the dampness and severe temperatures away from your freezer. Your freezer will likely last less time if it is kept in the garage, outdoors, or even near a window with a lot of sunlight.
What are the Different Types of Freezers Available in the Market?
Box Freezer/Cartoon Freezer
The mechanically complex freezers known as cartoon freezers, also known as box freezers, are built on a rather basic freezing premise. Products that have previously been packaged and put into boxes are mechanically sorted, moved, and stored, stacking them on shelves in storage with blasts of icy air. These crates are typically left for an extended period before being mechanically unloaded. The entire system is automated and only requires a small amount of labor. However, it is not appropriate for many kinds of products.
Spiral Belt Freezer
The spiral belt freezer may be an excellent option for delicate products because it reduces product damage at transfer locations. This technique also offers a very large area on a small footprint, enabling high throughput and continuous production with a small workforce. The spiral belt freezer still exhibits the drawbacks of the belt, though. In this instance, the belt is curved around a central supporting structure to maximize the surface area of the belt in a constrained area.
Brine Freezer or Immersion Freezer
In an immersion freezer, the product is submerged in a tank filled with a cooled freezing medium, which can be chemicals, salt, or sugar combinations. The immersion method is the quickest way to freeze food, and it’s frequently used to pre-treat bulky items to form a frozen layer before they undergo deeper freezing to prevent dehydration. The drawback to this approach is how rapidly the product dilutes the solution, which can affect how quickly and efficiently a process moves forward.
How do Freezers Work?
Heat is drawn out of the freezing compartment to power a freezer’s working mechanism. The process begins with the gaseous refrigerant entering the compressor, where it is compressed.
At this moment, the gas’s temperature is exceedingly high. The freezing system’s multiple coils cause the hot gaseous refrigerant to lose heat as it passes through them, beginning to chill.
The gaseous refrigerant becomes liquefied as it is cooled to an extremely low temperature. The liquid refrigerant is then pushed into the expansion valve, where it is forced through its tiny hole to become a cool mist.
More and more coils circulate the cold mist through the system. As it absorbs heat along the journey, it begins to evaporate and returns as a gas.
The mist is currently -27 degrees in temperature. It returns to gas form by absorbing the heat from the frozen compartment.
When the refrigerant turns back into a gas, it is transferred to the compressor once more, compressed, and the cycle is repeated. The cycle is repeated until the refrigerant has completely removed all of the heat from the freezing compartment and left nothing behind. Food kept in freezers freezes as a result of this.
The method for making light microscopy observations is entirely sample-dependent. High-pressure freezing is especially crucial for some difficult-to-fix samples and the best ultrastructure preservation in samples bigger than a few micrometers. However, the high-pressure freezer use relies on how quickly the biological event of interest needs to be captured (frozen).
The Leica EM PACT2 with a quick transfer system performs effectively for events demanding high temporal resolution (in the range of 4-5 s). Any brand of the high-pressure freezer will work for correlative work on structures of interest that are either immobile or moving slowly (minutes as opposed to seconds). We also discuss various initiatives to enhance the capabilities of the Leica EM PACT2 quick transfer system.
Conclusion
While the freezer is off, you’ll want to clean the inside of the unit. You can use a vacuum cleaner or a baking soda solution to remove dirt and mold from the condenser coils. You’ll also want to wipe down the seals of the unit’s doors.
After the unit’s interior has been thoroughly cleaned, you’ll want to turn the freezer back on. You’ll need to ensure the unit is set to the proper temperature. Then, you’ll want to replace the liquids in the freezer every few minutes. This will accelerate the defrosting process.
