
The last step in the lengthy and labour-intensive process of baking a cake is proper storage. Keeping a cake fresh for a short period is easier than keeping it fresh for a lengthy period, which typically involves freezing the cake. Cake leftovers should be stored following the guidelines for its most perishable ingredients to ensure that it continues to taste as excellent the next day as they did the first. Since most cakes are delicate, they often dry out or even begin to go bad overnight if improper storage is not used.
There are several different ways to store a cake overnight. If you don’t want to use a refrigerator, you can always put it in the freezer. Cakes will retain their freshness for up to two months in the freezer. It’s best to store them in the back of the freezer, where the temperature stays consistent and is least likely to fluctuate. Another option is to store them in a vacuum-sealed freezer bag. An airtight container is also a good choice to keep moisture and odours away.
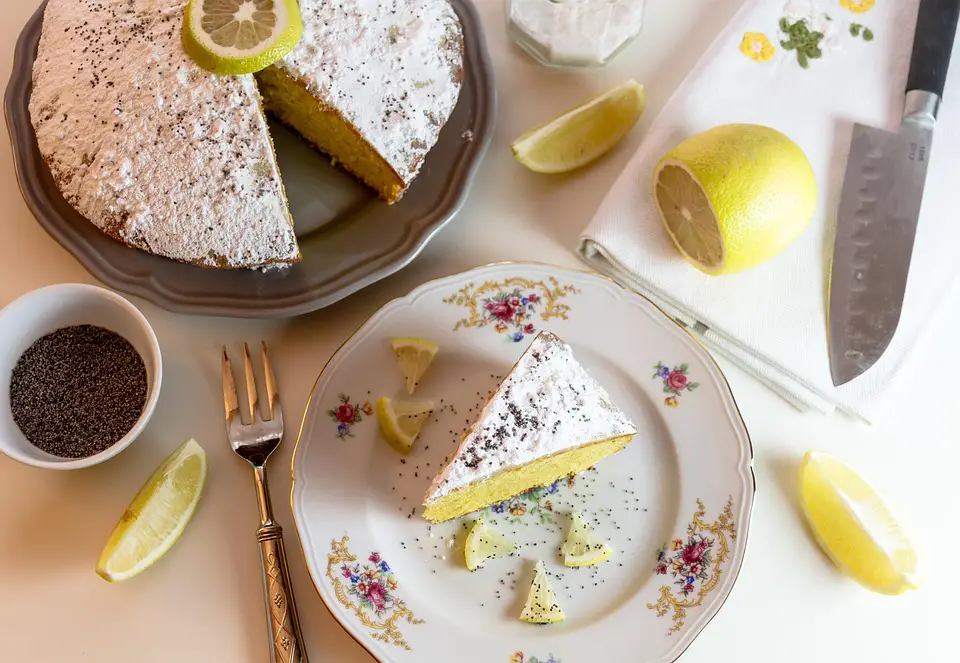
How to Store a Cake Overnight?
Step 1: Keep an unfrosted, plain cake at room temperature for up to five days by carefully wrapping it in one layer of plastic. Before wrapping the cake, it must be entirely cool to prevent condensation from ruining it.
Step 2: At room temperature, keep a cake decorated with nonperishable items, such as icing made of sugar and vegetable oil and jam filling. Place it on a cake plate and top it with a dome allowing icing to pass through. Alternately, place the plated cake inside a container with a secure top that is big enough to hold the cake without touching it.
Step 3: Place a cake with perishable icing and filling, such as those made with eggs, dairy products, and fresh fruit, on a domed cake plate or in a refrigerator-safe container. When left out, perishable products are vulnerable to mould growth. Replace the dome, loosely wrap the cake in plastic wrap, and refrigerate it overnight once the icing has hardened. Before serving, take the plastic wrap off the cake and let it warm to room temperature. Otherwise, it will be more brittle and flavourless.
Step 4: For up to a day, keep a cake with buttercream frosting on a domed cake plate or in an airtight container in a cold or room-temperature setting. If the cake is warm, chill it on a domed plate in the refrigerator until the frosting has set. After that, cover it again with plastic wrap and put it in the refrigerator. Up to five days can pass before the cake spoils.
Step 5: Place the cooled cheesecake on a tray in the refrigerator and wrap it in two layers of plastic.
Step 6: Keep meringue-topped cakes at room temperature for up to three days in an airtight container.
Tips
If you don’t have a large enough container with a tight-fitting lid or a domed cake plate, place your cake on a large plate and cover it with an upside-down bowl. The bowl must be large enough to clear the sides and top of the cake, whether it is frosted or covered in glaze.
Cakes with less butter tend to dry out more quickly than ones with more butter. Under a dome, most cakes stay fresh for around three days.
The Best Homemade Cake: How to Make it from Scratch?
A freshly baked cake covered in frosting is a delectable homemade dessert. Intimidated? Start here. We’ll show you how to consistently make a moist and delicious cake, whether you need it for a particular birthday cake or an expensive festival cake. We’ll even demonstrate how to frost a cake flawlessly.
Step 1: Prepare the Baking Pans
Make sure your pans are prepared before pouring the mixture in because no one wants their cake to stick to the pan. Except for angel food and chiffon cakes, most recipes ask for flouring, greasing, and lining the pan with waxed or parchment paper.
When selecting a baking pan, Our Test Kitchen prefers glossy pans for their golden appearance. If using a dark or dull-finish pan, lower the oven temperature by 25°F and check doneness 3 to prevent over-browning 5 minutes early.
Step 2: Allow the Ingredients to Warm Up
Butter and eggs must be at room temperature before being used in many cake recipes. (For food safety, don’t leave the eggs at room temperature for longer than the recipe directs.) As a result, the butter can readily mix with the other ingredients, increasing the volume of the cake.
Step 3: Warm the Oven Up
A cake that bakes too quickly could form cracks and tunnels, whereas a cake that bakes slowly could get gritty. After giving it at least 10 minutes to warm up, use an oven thermometer to check the temperature. Using black cake pans, you must reduce the oven temperature by 25 degrees.
Step 4: Combine by Stirring. Dry Substances
Mix the dry ingredients in a bowl before adding them to the batter ($6, Walmart) to save time. By doing this, the ingredients are distributed uniformly throughout the batter. Common dry components include flour, baking soda, baking powder, and salt.
Step 5: Mix the Butter and Sugar
Are you looking for a recipe for a cake with a tender, fluffy crumb? The crucial step is to cream the butter and sugar. This is how:
- Whip the butter with an electric mixer at a medium-high speed for 30 seconds. For this step, a hand mixer should be set to a quicker speed and a stand mixer to a medium speed.
- Beat in the sugar (and vanilla extract, if the recipe asks for it) at medium speed until the ingredients are thoroughly combined, and the batter has a light, fluffy texture. This task can be finished in 3 to 5 minutes. (DO NOT cut this off.) Scrape the sides of the bowl occasionally while beating. Tiny bubbles will emerge as the butter and sugar combine, giving your cake a lovely, light, fluffy texture.
Step 6: Add Eggs—One by One
Add the eggs (or egg whites) one time, beating well after each addition. Their protein forms a framework around air bubbles to maintain texture.
Step 7: Alternately Add the Dry and Wet Ingredients
Beat the butter, egg, and sugar mixture on low speed until combined after each addition, then add a portion of the flour mixture and a portion of the milk (or other liquid called for in the recipe). The procedure should start and end with the flour mixture.
This is because gluten forms when liquid and flour are combined. Avoid overmixing after adding the liquid and start and finish with flour to avoid creating a cake with too much gluten.
Step 8: Squeeze Batter into the Baking Dishes and Bake the Cake
Make sure the temperature is correct while baking a cake in the microwave. Set the convection mode on your microwave to 180 degrees if it has one. If not, set the power to level 10, or 100%, as indicated by your microwave. The maximum heat that a standard microwave oven can provide is level 10, and you need that level to bake a cake successfully.
What are the Points to Remember When Choosing an Oil for Baking Cakes?
Vegetable oil can always be used as a substitute for canola oil. Due to its high smoke point, this oil can be utilised in cake recipes. Oil cakes, as opposed to butter cakes, typically have a higher crumb and retain moisture longer. The following are some crucial details to bear in mind:
The cooking oil that best suits your recipe’s individual needs is ideal for cakes. Once you’ve discovered the ideal oil for baking, you can play around with it until you discover the ideal choice for you.
Another common alternative for cakes is vegetable oil. It is a great alternative to butter in many baked goods because it is non-overpowering and offers several advantages.
It is a better option when baking a cake, but it is not as healthy as canola oil, and some people think vegetable oil is unhealthy. So, which cooking oils are ideal for baking cakes? Olive oil, extra virgin and canola oil are the solutions to this problem. These are both great choices, and neither will impact the cake’s flavour.
Olive oil is the finest cooking oil for cakes because it doesn’t alter the flavour. Due to its bland flavour is a great substitute for vegetable oil and won’t change the cake’s flavour. Additionally, it will keep the cake’s ingredients moist, which is what you want. However, canola oil is the best to use while baking a cake if you must use vegetable oil.
Conclusion
If you want to store a cake at room temperature overnight, choose one that’s shelf-stable. These cakes can be stored for a week or more, or you can freeze them for up to two months. You should keep the cake away from extreme heat or moisture during this time. Otherwise, the cake may develop mould or bacteria. The most common sign of a bad cake is mould. Mould isn’t always harmful, but it usually means it’s not fresh.
If you are storing your cake at room temperature, you can protect it using a cake keeper or an upside-down dish. This will prevent the frosting from drying out and will protect your cake from dust and pet hair. You can also use plastic wrap, which will mess up your frosting. A cake keeper or upside-down bowl will protect your cake from dust and other particles and keep it fresh for four to five days.