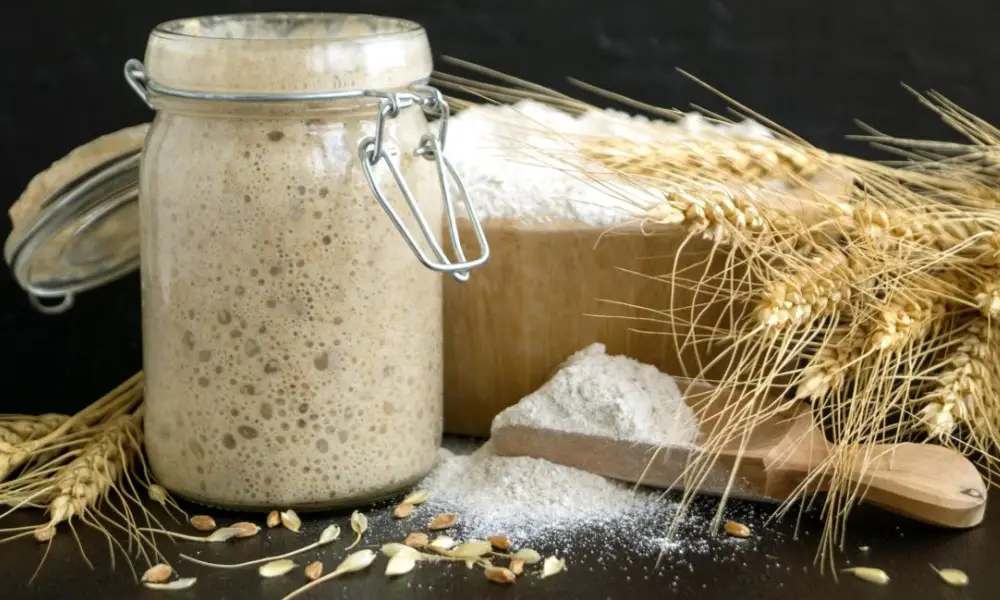
If you’re wondering how to freeze sourdough starter, you’ve come to the right place! Here are several ways you can preserve your starter: air drying it, feeding it after it’s been frozen, and preserving it for later use. To keep your starter active and healthy, follow these steps. After freezing it, you should continue feeding it as you normally maintain its health. To do this, you should feed it once or twice a day.
How to Freeze Sourdough Starter?
Your sourdough starter should be frozen or kept in the refrigerator, depending on your preferences. How frequently you wish to create sourdough bread is the issue you need to consider.
Refrigeration is your best bet if you want to bake sourdough every two weeks or even once a month.
On the other hand, freezing is the best option if you want to keep a beginning for a long time. This is excellent if you know you won’t be baking for a month or two, are traveling, or want to preserve a separate starter for special occasions.
There is no need to feed the starter in any scenario. It won’t require additional flour and water to keep it alive since it will become dormant, much like a bear in winter hibernation.
Refrigerate
It would help if you prepared for your baking whether you decide to freeze or chill your sourdough starter. It’s better to give the starter 2 to 3 days to warm up and get going again. Make careful to feed the starter during this period to give it a strong start and guarantee the success of your first loaf.
- One cup of your active sourdough starter should be added to a container with a tight-fitting lid.
- Making it stiffer can work better if the starting is very liquid. Add two parts flour and 1 part water to get this (you can add equal parts flour and water after warming to bring it back to a more liquid state).
- Place the jar in the coldest part of the refrigerator after sealing it.
- The starter should be fed once each month.
- Please take out the beginning and let it warm up before baking.
Sourdough Starter Freezing Techniques
Your long-term beginning storage option is the freezer, which doesn’t need to be fed. For pre-planning your first sourdough bread bake, use the same recommendations. However, given the significantly lower temperature, you might want to let it a full week before it warms up and resumes being fully active. Because each starter varies a little, apply your best judgment based on your individual experience.
One cup of starter should be frozen in a freezer-safe container or bag.
The starting should be taken out of the freezer and left to thaw in a bowl at room temperature until it is required.
How to Bring a Starter from Hibernation?
As it thaws, your starting will require feeding. The yeast needs food to emerge from its hibernation because it is a hungry organism. Because of this, you must get back on a feeding schedule before utilizing it for that first loaf of bread.
- The type of preserved starter you choose and the temperature in your kitchen will determine how long it takes to defrost. It can take a little more than a week, or it might be ready for bread in 2 to 3 days. It is important to restore it to an actively growing state akin to what it was before freezing.
- Take the beginning out of the fridge on the first day, and throw away at least half of it. Give it food as usual. Later in the day, if necessary, feed it once more (if you take it out in the morning, feed it again at night).
- As you normally would, keep feeding the starting once or twice a day until it regains its pre-freezing activity.
- The starter is ready for bread making when the growing activity is stabilized.
How to Recognize a Bad Sourdough Starter?
These are a few things that could impact your starter:
- If you see a pink or orange tint or streak, your sourdough starter probably went bad and needed to be thrown out. It’s time to start with the stiff starter put out at room temperature for two weeks. Not worth saving is this beginning.
- A sourdough starter is rotten or dead if it doesn’t respond to regular feedings after going for an extended period without food or if it starts to show signs of mold or discoloration.
- The lactic fermentation reaction in sourdough starters results in the production of lactic acid and acetic acid.
Lactic acid has a creamy, yogurt-like sourness, whereas acetic acid has a sharp, acetone-like sour bite.
The sourdough starter has an extremely acidic environment because the starter produces lactic acid as a waste product. Sourdough bread is largely safe since harmful germs have a hard time growing in the environment’s acidity.
- Keep the temperature of your beginning at about 70 degrees Fahrenheit. If your beginning becomes too hot, the yeast will perish. Some people place their starter in the oven to maintain warmth but forget to take it out before turning it on.
- As your starter may grow mold or bacteria bad for your bread, check on it periodically.
- If your starter has pink or orange-colored growth, throw it away and start over.
- You might notice “hooch,” or a liquid, on top of your beginning. As the yeast ferment, this liquid will develop if the starter has not been fed regularly enough. If you see an orange streak, remove the starter and start anew. The alcohol can change colors and still be safe.
After launching your starter, don’t be alarmed if you don’t observe any activity for a few days, such as bubbles. One day you might see bubbles, the next, you might not. Keep feeding your starter, and don’t worry; they should return in a few days.
Making it a habit to eat at the same time every day is the best thing you can do to create a good sourdough starter.
- Maintain a temperature of 70 degrees Fahrenheit; your starter could be killed if you go above or below.
- Make sure you start feeding in the exact quantity advised. Using too much or too little flour or water results in a poor start.
- While using a metal spoon to stir your food, you should avoid anything made of copper or aluminum.
- You can create a delicious and distinctive type of bread using a sourdough starter. You’ll reap the rewards of your time and effort and develop an addiction.
- Once you become familiar with this baking style, search online for websites that offer starter variations, tips on storing your next starting, and what to do with the pieces you’re supposed to discard.
On Day 3, How Should Your Sourdough Starter Smell?
What should my starter smell like? First and foremost, your opening shouldn’t smell like nail polish remover or exercise socks. If so, feeding it is all that is necessary.
The starter will have a tangier flavor and less bubble production, resulting in a lesser volume rise. When starting a new business, having alcohol around is not necessarily bad.
It will take 7 to 10 days for a new starter that you are beginning from scratch to be ready for bread baking. It will take your starter four to five days to activate and bulk up. A healthy yeast and bacterial colony should have adequate time to develop in your starter.
Your starting will release its distinctive smells after stabilizing and reaching the final stage. Despite its name, a healthy sourdough starter typically has a fresh yeasty fragrance with a little astringent note.
In Sourdough Bread, is it Possible to Use Too Much Starter?
It is a live food since it contains active yeast and bacteria. The carbohydrates and nutrients in the dough mix will be used too rapidly if you use too much beginning. If this happens, there won’t be the bubbles that fermentation should produce.
If your sourdough starter begins to deteriorate after the peak fermentation, you should re-feed it. It should have doubled in size after a few days. If you don’t feed the seedling for a long time, it can become moldy, but if you do, it should start growing again. After that, give your starting two weeks before checking on it to ensure it’s still alive.
If your sourdough starter has died or hasn’t been fed in a while because it’s gotten old, you must re-feed it. In a few days, a sourdough starter often doubles in size and returns to almost perfect condition. If nothing has changed after a few days, toss it and feed it once more.
How to Make Sourdough Starter at Home?
Ingredients:
All-purpose flour weighing 4 ounces (3/4 cup) and unchlorinated water weighing 4 ounces (1/2 cup) each day
Method:
- Assemble the components.
- You will make the initial starter on the first day. For precise measurements, weigh the flour and water.
- Within a 2-quart glass or plastic container, mix the flour and water. To accommodate the additional room required as you feed the starter during the week, you should pick a container that is a little bigger than you would think. Until smooth, stir.
- Add a lid, plastic wrap, or a fresh cloth and cover the container loosely. Although you don’t want the container to be airtight, you still want to protect the ingredients. Place the container in a warm house area, preferably between 70 and 75 degrees. Give it a day to rest.
- You might not see many changes in the mixture on day two. Please don’t use all of the beginning (you can throw it away or save it for a discarded project). Add 4 ounces of flour and 4 ounces of water to the starter. Place in the same warm location for 24 hours after smoothing out the mixture.
The sourdough starter will appear larger in volume and begin to develop bubbles on its surface on the third day. It will resemble thick batter in consistency, and you could detect a somewhat sour aroma. Once more, remove half of the starter and add 4 ounces of flour and 4 ounces of water to the starter. Place in the same warm location for 24 hours after smoothing out the mixture.
The sourdough starter will be extremely bubbly on the fourth day, with both big and small bubbles. Even more pronounced and potent will be the sour fragrance. Once more, discard half and add 4 ounces of flour and 4 ounces of water to the starter.
- Place in the same warm location for 24 hours after smoothing out the mixture.
- Your starter ought to be usable by day five. It will smell nasty and be extremely fizzy. You can now either start using or tossing half of the starting because you no longer need to bulk up the starter.
- Half of the starting should be removed from the bowl to sustain it. (This is required to keep the starter’s flour to water ratio at 1:1.) Additionally, it maintains a manageable initial quantity for use in home cooking.)
- The other half will be fed 4 ounces of flour and 4 ounces of water. Half will be utilized for a recipe. Once more, combine until thoroughly combined, cover, and keep warm. If you intend to use the starter for several days, you can leave it at room temperature and keep feeding it daily while discarding half of it.
- Create your favorite sourdough recipe with the remaining starter.
If you bake weekly or monthly and wish to wait longer before using your starting again, you can store it in the refrigerator. In this situation, add 8 ounces of flour and 4 ounces of water to the starter. The outcome will be a thicker batter that will keep the yeast active for longer in the refrigerator.
The thick starter should be kept in the refrigerator with a flimsy lid. The starter only needs to be fed once a week (with 8 ounces of flour and 4 ounces of water) when it is kept in the refrigerator instead of daily.
Conclusion
The first step is to spread the starter thinly on a sheet of parchment paper. Please place it in an area with lots of airflows, like an open cupboard. Then, leave it there for 48 to 72 hours. The resulting starter will be light brown and brittle. Repeat the process one more day. This will make the starter even softer and ready for use in baking. If you haven’t already done so, you should freeze the starter immediately.
To dehydrate a sourdough starter, follow the directions on the package. After a week, your starter should be dry but not completely spongy. This is because moisture has the potential to destroy the starter culture. It would help if you also ensured the starter is fed regularly to keep it healthy. You can also use a dehydrator to speed up the drying process. You can use a convection oven if you don’t have a dehydrator.